Showing posts with label art workshops. Show all posts

Monday, 7 June 2010

PS TO MIXED MEDIA PREVIOUS POST

If you read right through my previous post on this mixed media day, you will remember I was having problems with adding additional images. I thought it was a shame for you not to see some of the finished paintings, so here they are :
a great result using quite a large proportion of collage.
wonderful result from one of our newer ladies- doesn't the black lace and fringe of the Spanish shawl provide a strong base to the brighter colours.

and lots of contrast with this lovely lady with her jewelled necklace and hat trim from glitter and beads. The tissue papered orchids and patterned paper strips skirt really work as well as the added pastel over the mid ground grey.
Well done ladies attending my first mixed media workshop at Coltishall.

MIXED MEDIA WORKSHOP

Had a small group this Saturday. I think I made a mistake in choosing the first Saturday of every month, as the dates coincide with Bank Holidays and now school holidays.

We began with choosing our individual subject, sketching in and adding first layer of watercolour washes. Where wanted, patterned papers or tissue were glued in before moving onto acrylic layers, with added glitter, beads, etc. Then deciding on adding pastel over the acrylics and penmarks where appropriate. Each piece of work took the whole day to develop.


This still life subject became a wonderful painting, the artist using watercolour washes with added acrylic, glitter for the grey shiny evening shoes, gutta silver to help create the pearls, torn grey leather-like papers for the shoes' bows and lots of other imaginative applications. I can't upload the finished work - such a pity it was stunning.
this subject became a very colourful work from the original sketch and water colour washes through to addition of acrylics, pastels and penwork.
My system won't let me upload any more images, but this early creation of a lovely lady came from a statue in front of a silver vase full of white orchids. These blooms were added with torn small strips of white tissue with added tones of yellow in the highlights and blues in the shadows. Again I can't show you the finished work.
This subject started with this first watercolour wash.
We break now for the summer with a sketching garden party in July and sketching by the local river in August.
I'll post and then see if I can edit. Great day by all, however small in numbers.

Tuesday, 18 May 2010

PASTEL WORKSHOP


two works in progress (plus the inevitable cups of tea)


Way back at the beginning of May I had a pastel workshop with my regular artists, but realised this morning that due to so much dashing about I had not posted info about our day together here in Coltishall village hall. It seems (thank goodness for my routine) I had put the photos I had taken onto my hard drive Coltishall workshop folder, so it was easy to find them.


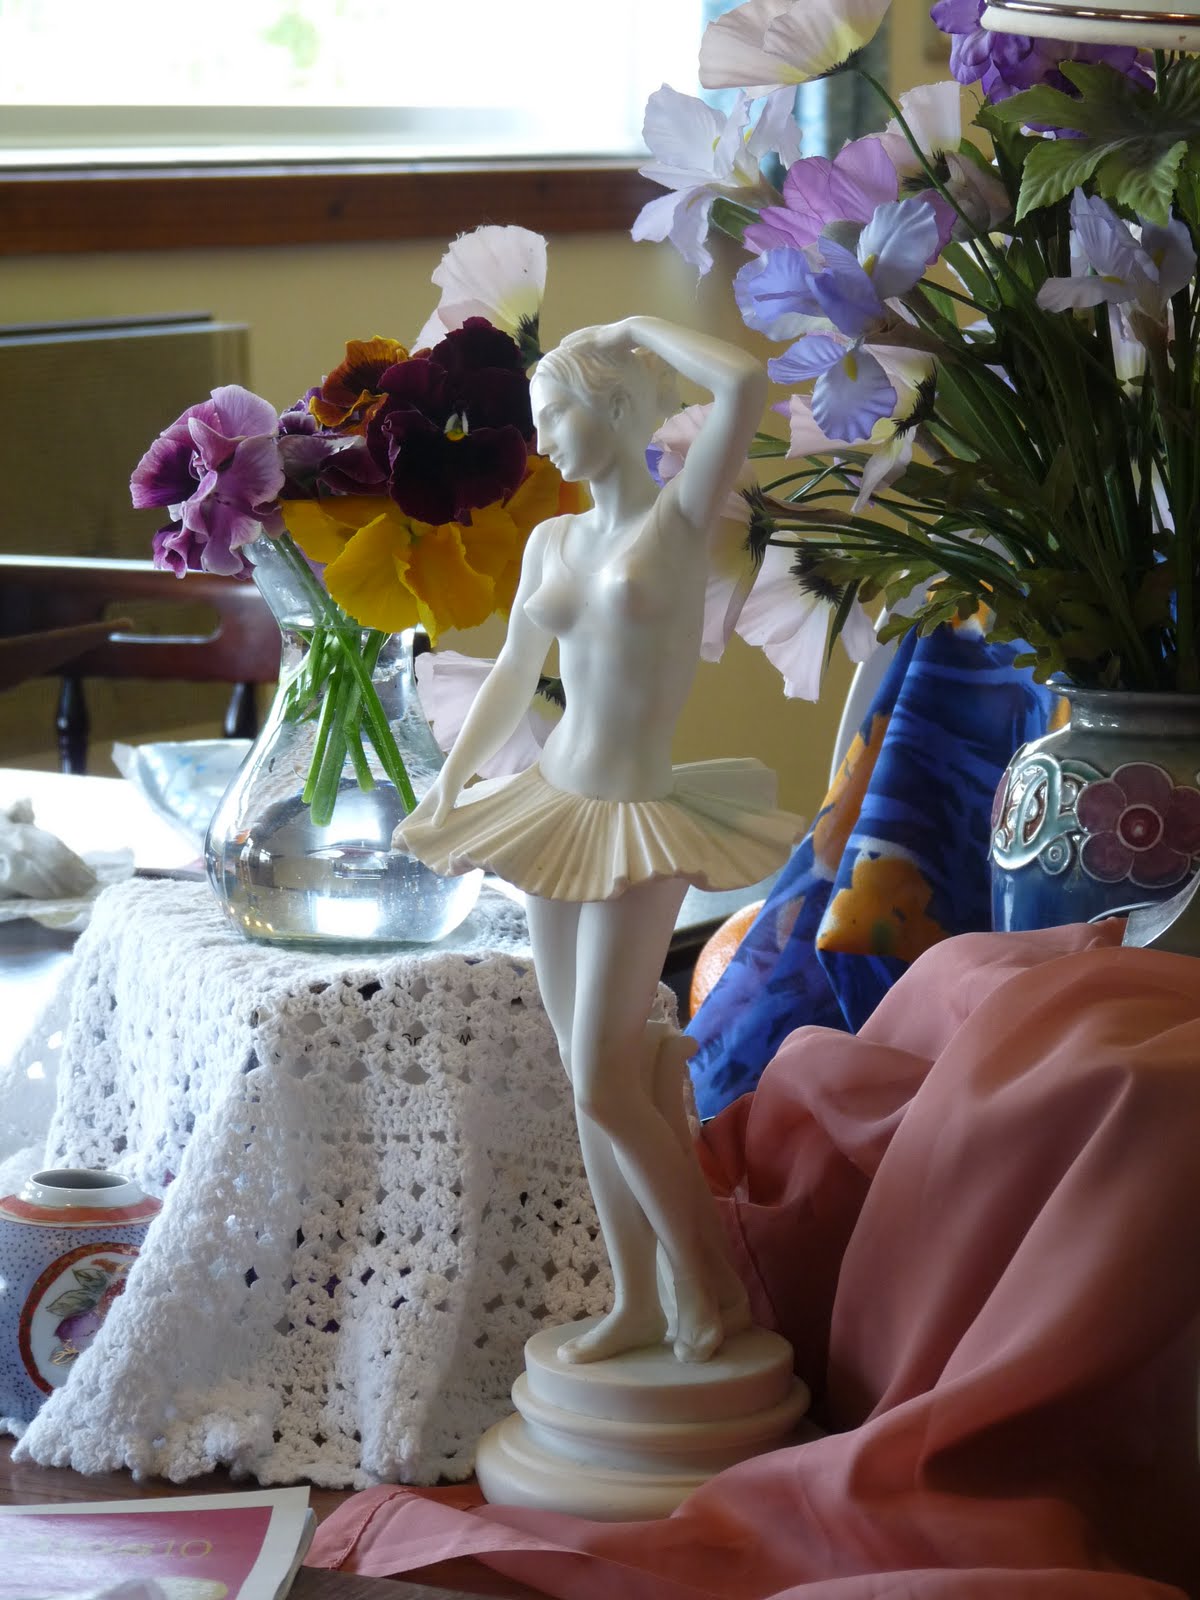
I took many brightly coloured subjects and one of our kind ladies brought some new interesting figures and pots. So here are a some photos of the subjects they all chose from - I loved them so much I wanted to join in and in fact took photos for use in my studio when I get the time:


dancer, pansies and lace - blue plate, orange and vase of flowers

floral portion of our mixed subjects for a pastel workshop.


The morning began a little different than most of my workshops, as we plunged straight into a full subject learning as we went. Here are some works in progress (as well as the photo at the top):


... and here are some floral works :


I could not get all the variety of work into this post, but must mention our young lady's work on the Venetian mask Maggie kindly brought in for us. It would also seem we got so involved I did not photo the finished work at the end of the day and I know there was a delightful study of the ballerina with flowers as well as the one above with the lamp . Naughty tutor!!
PS: I have had real trouble with this post - with uploading the images and now with this massive space before the comments and other details - it won't let me delete blank lines all the way down!!!! I've given up trying so keep going if you want to add a comment please!!
I've been in to get rid of the blank lines this morning, hurrah it worked today!!

Sunday, 25 April 2010

ACRYLIC WORKSHOP

Don't forget to
enlarge images.
14 members of the Sutton Bridge art group attended this workshop in Lincolnshire last Wednesday, before I moved on to stay with friends. Arriving after a very easy journey with hardly any traffic, the first thing I asked was for the tables to be set up as above, so that everyone could face inwards to the 4 or 5 different still life subjects I setup in the middle. These covered
my good old copper pots with oranges and my tall African family statue;
grapes and china plate and bowl;
brown ceramic fruit bowl with pineapple and white and terracotta tea towel;
blue vase with yellow daffodils ;
dried flower arrangement of hydrangea heads, artichokes, my wooden snowdrops and large peonies all in a chunky creamy and brown country vase and my bronze cat.
All had draped cloths of varying colours and patterns as backdrops.
I also took along a few paintings to demonstrate the various techniques from sculpting with modelling paste, use of crackleglaze for some candles, blending soft colours, splattering, glazes of thin layers, and applications of heavy duty, normal consistency pigment through to acrylic inks and finally the use of gutta silk paints to add decorative elements.
After discussing the various acrylics and mediums available on the market over a cup of coffee, we then quickly moved onto the methods of applying acrylic paint. We started with thin washes overlaying dried paint to see how glazes work to create luminosity and the method of mixing paint on the canvas to keep the colours pure. Moved on to applying thick paint with knife in large areas and then mosaic broken lines of various colours or tones to achieve an impressionist effect.
Before lunch break, we had covered
masking with card, torn paper and masking tape;
spattering with toothbrushes;
flicking a loaded brush;
all wet on wet and wet on dry to see the different effects.
Finally I gave away my secret of 'printing' colour shapes after applying paint to pieces of watercolour paper.
Everyone had the chance to try various mediums from flow enhancer, sand, beads, etc and my gutta silk paints for gold or silver highlights. We discussed crackleglaze and tried using modelling paste.
During the last few moments of the morning everyone prepared a stretched canvas with gesso coloured and applied as they chose. A very busy morning, getting us all ready for a 'masterpiece' using chosen techniques in the afternoon.
AFTERNOON CANVAS WORK
Amazingly, quite a number chose to work with modelling paste and one lady did a close up of a daffodil simply using this technique for the petal shapes and placing colour afterwards. Two other ladies asked if they might use my 'sculptured poppies' painting as inspiration to use modelling paste and the impressionist mosaic style of applying acrylic paint.

modelling paste close up daffodil and sculptured poppies in progress

photo of one of the still life subjects with acrylic painting in progress , paint having been applied very thickly on gessoed smooth background.


This lady was very clever in creating the artichokes and teasel by placing modelling paste with a knife in small marks to create the various shapes that made up the individual dried heads.

Two other works created in the afternoon are posted below. Unfortunately, I did not get round to everyone with the camera as they finished their main work, such a pity as there were some really different interesting pieces such as the African family statue, where the artist had added beads, seeds and silk gutta in gold to create their costume jewellery.


this gentleman used varied washes for his background on top of white gesso (the white area would turn into a lace tablecloth by the end)
and another gentleman started to block in after placing composition with brush and diluted acrylic
All in all a very happy, funfilled and successful day - of that I am assured as I have been asked to visit them again for another workshop. Sorry if it has turned out to be rather a long post - hope you manage to drag yourself through all the text to the images at the end.

Wednesday, 7 April 2010

PEN AND INK WORKSHOP

Just finished a very busy Easter Weekend, with this pen and ink and watercolour washes workshop on the Saturday.

The morning started with everyone practicing different marks with both dip pen and bottles of ink and the use of technical pens of various thickness. Then moved onto using brushes dipped in the ink and diluted with water. The first subject was the pot of ink and box in front of each artists. Here are two studies of members' morning work putting all the previous practice together.


This following page of work shows pen work on the left and brush only on right.


Later in the day everyone chose a particular subject from the variety of things I had brought in. They either worked with pen followed by water colour washes, or bravely tackled their chosen subject with shapes of water colour washes first and when dry added pen marks for the detail. Here are some results.


Here are some samples of work from our new members, who have very bravely been 'thrown in the deep end' and came up swimming really well.

... and finally, here is one of our younger member's working on an illustration for a children's book all about a llama. I hope I have not given any secrets away.

A great day had by all and an hour after getting home my family arrived!! When they left, Elisha (my youngest grand daughter aged 9) stayed for an extra few days and we had lots of fun together.

Sunday, 7 March 2010

WATERCOLOUR PENCIL WORKSHOP

Our first workshop of the year took place on Saturday when we worked with watercolour pencils. The morning was taken up with practicing the many diverse methods of using this media from dry contour work, to drawing into wet paper, scrapping pigment from the tip of the pencil, cross hatching, blending, lifting to create highlights, etc. Each member attending selected an object from the many objects I had collected and brought in from a mixed supply of fresh fruit, to small ceramic figures, pots, feathers, jugs, cones and on and on as seen in this photo.


Here is some early work by my regulars showing contour drawing, wetting the pigment after applying to dry paper, wetting tip of pencil for strong marks, lifting out colour and scrapping pigment from the tip of the pencil onto wet paper.


We had four new members to the group and some of their morning practicing work is shown below: The first two images show work by two young teenagers who joined us with undoubted artistic talents wishing to develop their skills.
The strawberries and apples were painted by new members who would normally go through my basic drawing skills before embarking on colour work and under the circumstances very courageously tried these rather complex techniques.
Finally, I am proud to say that one of my teenage regulars is embarking on an illustrative project for a children's storybook and found watercolour pencils really interesting to develop her characters.
The day flew by with our usual breaks for drinks and biscuits (am) and cakes (pm) with everyone really surprised to find how this overlooked cinderella media is so versatile.

Tuesday, 10 November 2009

PEN AND INK WORKSHOP

Photo of the main set up of everything from feathers,
cones, berries, leaves, clocks, boxes of jewellery, pearls,
elephant and lady china and cyclamen pot.


This month's workshop was to bring the regulars out of their comfort zone, so I planned the use of not only the technical pens but dip pens in bottles of coloured inks. I set up a large mixed, jumble sale style collection of objects on top of a large box covered with interesting cloth.

Here are some of the views for members to select their main compositions
for the main afternoon piece of art work.

In the morning we practiced using different pen nibs and thickness technical pens. Firstly, dividing a watercolour page of hot press smooth paper into two, then sketching an object of choice with the different pens. One was to be coloured with inks using both brushes and pen nibs creating linear and other marks for texture to bring out specific areas of detail.

Here are some samples:


From their choices, it would seem my love of natural history has passed on to my members, as there were many china statues, broaches, boxes that were not chosen initially.
By the time we had finished a lunch break, I had set up the main centre piece for each member to move around the room and choose a viewpoint selecting around 3 objects for their individual composition. Then came the rub !!! I requested them to place each object onto their watercolour pad by use of coloured ink block areas with no prior drawing or penwork. This way, when pen was added I hoped the work would look more spontaeous and the colours bleeding outside the linear marks.


Here are some works in progress and as yet without a pen mark having been made and note the use of large brushes for the washes:


I did not realise how much the cyclamen pot rose above everything else dominating each piece of work from all angles .. but some chose to add elephants, some had clocks and unfortunately our young teenager's main piece was not photographed as she worked on the lady and round red/gold jewellery box.


Good day together and lots of comments of 'you are making us think'!! and 'how interesting to work so differently from the usual pencil sketch and watercolour layers'. That was the idea!!!