Showing posts with label still life. Show all posts

Monday, 18 October 2010

STABILO SOLUBLE FINELINER PENS

I am certain you will have read that I am going on holiday to Italy next May with Anita sketching in a number of cities on a tour . Ever since our booking, I have been practicing buildings and people from DVD's and holiday brochures in different media trying to find a particular technique and materials I would like to take with me.

I have my Lamy cartridge pen with Noodlers Lexington grey ink I thought would do beautifully with overwashes of watercolour, but realised well into producing a series of work from my book on the Sistene Chapel that I actually needed soluble ink. So last night, the last evening of Anita's visit, we set up a still life and I tried out my set of stabilo pens to see which bled the most. It turned out that the result was dependent on the paper used. This made me realise why my sketches the previous day in Norwich cathedral for the 29th sketch crawl with Anita came out so pale - it was the paper in the Derwent Journal bound with soft caramel coloured suede effect I had taken for the day. (I'll post these another time - probably via Flickr which I opened an account with this weekend with the guidance of Anita).

So here is the result in a watercolour book of the still life using the brown (45) stabilo fine liner and Daniel Smith watercolour washes.

... and a close up in case the full image does not enlarge so you can see how lovely the ink bleeds into the washes at the drawn line edges. :

Monday, 7 June 2010

PS TO MIXED MEDIA PREVIOUS POST

If you read right through my previous post on this mixed media day, you will remember I was having problems with adding additional images. I thought it was a shame for you not to see some of the finished paintings, so here they are :
a great result using quite a large proportion of collage.
wonderful result from one of our newer ladies- doesn't the black lace and fringe of the Spanish shawl provide a strong base to the brighter colours.

and lots of contrast with this lovely lady with her jewelled necklace and hat trim from glitter and beads. The tissue papered orchids and patterned paper strips skirt really work as well as the added pastel over the mid ground grey.
Well done ladies attending my first mixed media workshop at Coltishall.

MIXED MEDIA WORKSHOP

Had a small group this Saturday. I think I made a mistake in choosing the first Saturday of every month, as the dates coincide with Bank Holidays and now school holidays.

We began with choosing our individual subject, sketching in and adding first layer of watercolour washes. Where wanted, patterned papers or tissue were glued in before moving onto acrylic layers, with added glitter, beads, etc. Then deciding on adding pastel over the acrylics and penmarks where appropriate. Each piece of work took the whole day to develop.


This still life subject became a wonderful painting, the artist using watercolour washes with added acrylic, glitter for the grey shiny evening shoes, gutta silver to help create the pearls, torn grey leather-like papers for the shoes' bows and lots of other imaginative applications. I can't upload the finished work - such a pity it was stunning.
this subject became a very colourful work from the original sketch and water colour washes through to addition of acrylics, pastels and penwork.
My system won't let me upload any more images, but this early creation of a lovely lady came from a statue in front of a silver vase full of white orchids. These blooms were added with torn small strips of white tissue with added tones of yellow in the highlights and blues in the shadows. Again I can't show you the finished work.
This subject started with this first watercolour wash.
We break now for the summer with a sketching garden party in July and sketching by the local river in August.
I'll post and then see if I can edit. Great day by all, however small in numbers.

Tuesday, 18 May 2010

PASTEL WORKSHOP


two works in progress (plus the inevitable cups of tea)


Way back at the beginning of May I had a pastel workshop with my regular artists, but realised this morning that due to so much dashing about I had not posted info about our day together here in Coltishall village hall. It seems (thank goodness for my routine) I had put the photos I had taken onto my hard drive Coltishall workshop folder, so it was easy to find them.


I took many brightly coloured subjects and one of our kind ladies brought some new interesting figures and pots. So here are a some photos of the subjects they all chose from - I loved them so much I wanted to join in and in fact took photos for use in my studio when I get the time:


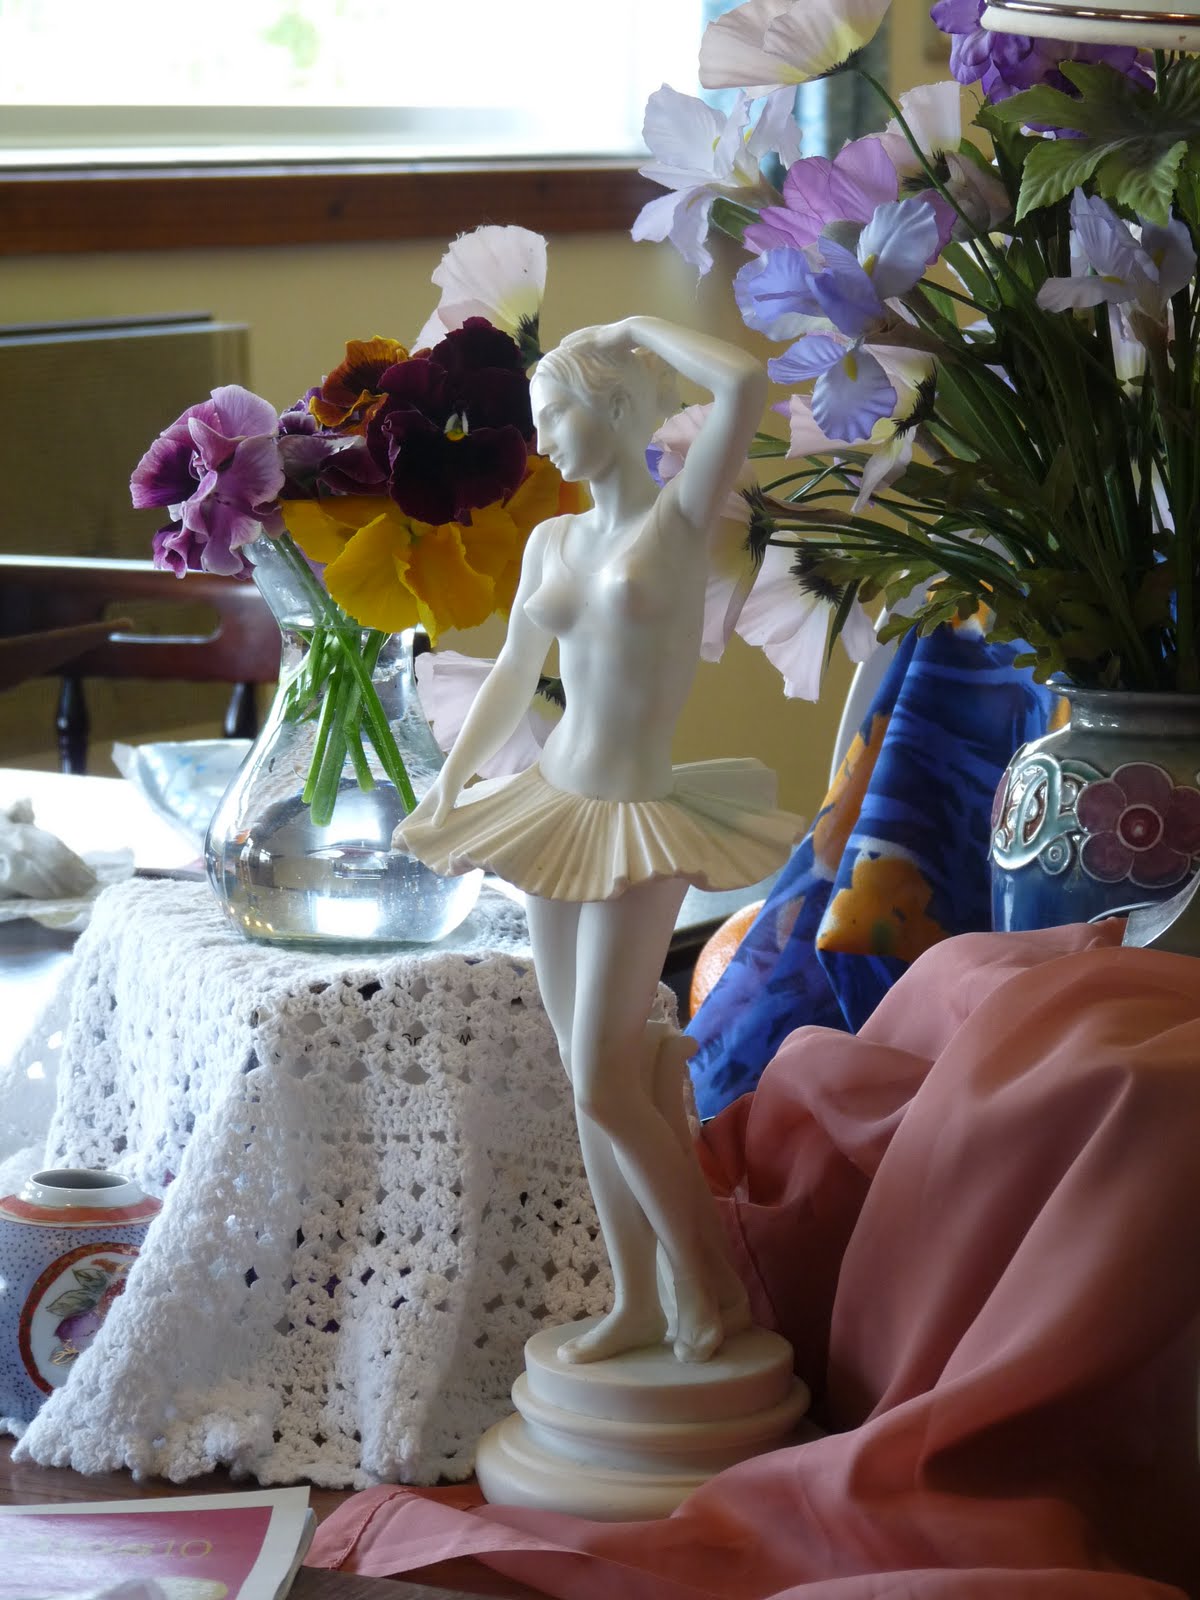
dancer, pansies and lace - blue plate, orange and vase of flowers

floral portion of our mixed subjects for a pastel workshop.


The morning began a little different than most of my workshops, as we plunged straight into a full subject learning as we went. Here are some works in progress (as well as the photo at the top):


... and here are some floral works :


I could not get all the variety of work into this post, but must mention our young lady's work on the Venetian mask Maggie kindly brought in for us. It would also seem we got so involved I did not photo the finished work at the end of the day and I know there was a delightful study of the ballerina with flowers as well as the one above with the lamp . Naughty tutor!!
PS: I have had real trouble with this post - with uploading the images and now with this massive space before the comments and other details - it won't let me delete blank lines all the way down!!!! I've given up trying so keep going if you want to add a comment please!!
I've been in to get rid of the blank lines this morning, hurrah it worked today!!

Tuesday, 10 November 2009

PEN AND INK WORKSHOP

Photo of the main set up of everything from feathers,
cones, berries, leaves, clocks, boxes of jewellery, pearls,
elephant and lady china and cyclamen pot.


This month's workshop was to bring the regulars out of their comfort zone, so I planned the use of not only the technical pens but dip pens in bottles of coloured inks. I set up a large mixed, jumble sale style collection of objects on top of a large box covered with interesting cloth.

Here are some of the views for members to select their main compositions
for the main afternoon piece of art work.

In the morning we practiced using different pen nibs and thickness technical pens. Firstly, dividing a watercolour page of hot press smooth paper into two, then sketching an object of choice with the different pens. One was to be coloured with inks using both brushes and pen nibs creating linear and other marks for texture to bring out specific areas of detail.

Here are some samples:


From their choices, it would seem my love of natural history has passed on to my members, as there were many china statues, broaches, boxes that were not chosen initially.
By the time we had finished a lunch break, I had set up the main centre piece for each member to move around the room and choose a viewpoint selecting around 3 objects for their individual composition. Then came the rub !!! I requested them to place each object onto their watercolour pad by use of coloured ink block areas with no prior drawing or penwork. This way, when pen was added I hoped the work would look more spontaeous and the colours bleeding outside the linear marks.


Here are some works in progress and as yet without a pen mark having been made and note the use of large brushes for the washes:


I did not realise how much the cyclamen pot rose above everything else dominating each piece of work from all angles .. but some chose to add elephants, some had clocks and unfortunately our young teenager's main piece was not photographed as she worked on the lady and round red/gold jewellery box.


Good day together and lots of comments of 'you are making us think'!! and 'how interesting to work so differently from the usual pencil sketch and watercolour layers'. That was the idea!!!

Monday, 14 September 2009

SALHOUSE CHURCH AUCTION

Towards the end of last year you may remember a post of a watercolour demonstration I did at our local gallery, where the owner had invited me in order to advertise my monthly workshops at his gallery open day. . I ran a raffle at the December workshop as a gift to my members and it was won by the kind lady who brought the dressing up clothes to the last workshop . This was the watercolour result, which I am showing so you can see how different the same subject can be depending on the media used and whether you want to achieve an exact likeness or experiment with the subejct.

1. Watercolour I have recently been invited to submit a piece of work for an auction to raise funds for a nearby village church fund. As I did not have much time, I thought I would use as a basis the 16" x 16" box canvas acrylic I had started at the gallery demonstration but never finished.

2. Acrylic version early stages Here is how I began to develop the original boxed in layers at the gallery, using thick impasto gesso primer to mark out the circular vase and lithe lady statuette, both of which reside in my lounge. Using acrylic I was able to simply play and use whatever colours I wanted. You can see I have marked out where the orchids will eventually be painted and thoughts of reflections and shadows at the base of the canvas.

3. Finished acrylic This is the finished piece, having softened the background with Liquitex aqua green mixed with white and acrylic matt gel medium, applied with a two inch soft sponge roller in two directions. (I think enlarging you will see the 'squared' effect this achieves). I also developed the orchid blooms from a pot growing in my lounge and worked on the surface of the vase. The final effect was to bring the rollered aqua colours down over the table to bring harmony to the whole piece.

It will be interesting to see how much it fetches at the auction on the 26th September.

Sunday, 19 April 2009

DERSINGHAM GARDEN WEEKEND

As I felt the need to have a break from actual painting, with all the work I created for the Rising Sun, I decided to spend the weekend going through my wooden chest of older unframed works and paintings in acrylic and watercolour pads. Two of the pieces I came up with belong to a series called THE TEA TIME SERIES but created in very different media.


I have a favourite water colour artist, Shirley Trevena, who does floral and interior still life work that is truly stunning and a style all her own. This first piece I found was when I decided to create my work combining my love or floral and still life, but without copying Sheila's lose style. I allowed the paints to run in places and even 'printed' patterns from embroidered/embossed ribbons I have in my collage box. I simply made it all up as I went along with hardly any drawing . The window effect came last - and eventually became a series in its own right.


This second one is completely different with lots of collaged ribbons, gold, linen strips from the edge of old cushions and acrylic paint. I think this was inspired by a visit to John Lewis furnishing department to see what colours were fashionable for the home - and it turned out this soft blue mixed with creams and browns. Sorry photo is a bit crooked, but I've packed it away now for the show.
The show is mid May at a little town/village in Norfolk near the Queen's Estate at Sandringham and they are having a weekend open garden event combined with arts and crafts. Most of my pieces I'm taking are garden and floral pieces I have mounted and put into sleeves, so I can keep them quite reasonable.... as framing really shoots the price up when you choose something to go with the work. Both paintings are 16 x 12 ins.

Sunday, 5 April 2009

PASTEL WORKSHOP

sorry this first image is blurred but gives you the full range of subjects
Sorry long time since I posted anything - many reasons. We had our pastel workshop yesterday in the village and the above shows the many colourful subjects I brought in for the members to choose from for their main work in the afternoon. In the morning we did our usual thing of practicing different techniques and ways to use the media from lovely Unison and Sminke soft pastels to the harder squared edge sticks and pastel pencils. We discussed the various types of pastel and grounds one can purchase and the application of blocking in with varied pressure, layering, blending, mixing colours and fine detail.
Here you can see some exceptional competent work for first timers to pastel and the main words I heard throughout the day were 'immediacy' and 'messy'. Everyone shared what they had brought in and the search for the right colour was contrasted with the mixing of colours by layering to create tone. Finally we discussed the need to 'fix' but leave the last touch of highlights until afterwards to ensure they stayed bright.
This is the early stages on a coloured pastel paper ground, which was finally covered in a very light blue using the side of a soft pastel to enhance the finished colours and tones of the subjects. Note this artist was brave enough to add the copper jug still to be blocked in here.
The high colours of the fruit bowl seemed to attract most of the members and here you can see the early blocking in stages on cream pastel paper. Helen kept her colours very pure and the background very light in application and colour.
Here are two other pieces of artwork at the end of the day
one with a very different viewpoint including the bronze cat, where a deeper blue was added to the soft blue pastel paper at the end of the day:


This is the end of day's work of our only gentleman, with its vibrancy and strong shapes.
Since last Spring we have covered drawing and tonal skills in both graphite and ink, composition and perspective, colour theory and water colour techniques, pen and wash, watercolour pencil, acrylic and now pastel. Not bad in just over a year. Such a pity my numbers are dwiddling, but I have had to move venues to the village hall and now have a web page advertising my workshops on the parish council website, so hopefully may improve.

Sunday, 23 November 2008

WATERCOLOUR DEMONSTRATION LOCAL GALLERY

I little while ago the owner of the local Swallowtail Gallery advised me he was arranging an OPEN DAY for his gallery , framers and art materials business in the village and invited me to do a watercolour demonstration to publicise my local WORKSHOPS. What a great opportunity to communicate with more people interested in art. The event arrived yesterday, and as you will see we could not have chosen a worse weekend weather wise - as can be proved by my garden photos taken this morning. Thats right it is snowing in lovely Norfolk and looks delightful but keeps people at home!!!!

David had publicised the event at a number of local villages, art orientated clubs such as a calligraphy group and weekly art groups and shops and as a result about 40 people came through the door. There were two other demonstrators - one showing visitors how to use the silk painting kits David sold in the gallery and his wife and children creating some very unusual animated greetings card kits also on sale ( which I plan to purchase for my grand children to do over Christmas when the family are staying with us for 3 days) .
At one time I had a number of people looking at my sketchbooks, the workshop guidelines folder and images of work created by students during some of our different workshops on tonal studies, watercolours, acrylic and flowers. Then once I actually started the watercolouor subject a group stayed for quite a while asking questions about such things as advice on the brushes and the manufacture of watercolours etc I use. We practically had a mini class on glazes, colour theory, etc and I thoroughly enjoyed it. I was pleased to see some of my workshop publicity leaflets were taken. So here's the subject :
click to enlarge both images
I used Senellier and a few Winsor and Newton watercolours and round Cirrus Kolinsky Sable brushes 0, 4 and an 8 and taped some 200lb Sanders Waterford NOT paper onto a board.