I have just spent a few days at my daughters home with her three daughters and one day Channais (17 next month) and I had time together whilst the youngest two were at school, so I talked about zentangles and showed her how to create one - this was the result. I decided not to make it too complicated (as I am wont to do) and in actual fact only did the main 'floral centrepiece' which I used to start the design, plus the 'bubbles' and the two 'leaves' until I got home and finished off the background with all the little tulip shapes and extra leaves.
Makes me think Spring is on the way - which leads me nicely onto the fact that on arriving home I found the forsythia out in full bloom and some little snowdrops poking up their little heads in the sheltered back garden . ... so hopefully I will get out my garden sketchbook tomorrow and achieve a painting for January - on the last day!!
Friday, 30 January 2009
Monday, 26 January 2009
YUPO BACKGROUNDS AND NO 2 FLORAL PIECE
Thought you might be interested in how I have been playing with backgrounds for paintings on YUPO, as I know a lot of people get scared about such matters. I have a head start as many moons ago I used to use ink acrylics in a similar way, just adding areas of chosen colour for the subject and then spraying with water and leaving at a slight angle to merge and run. Here are three different examples of my YUPO/watercolour experiments:
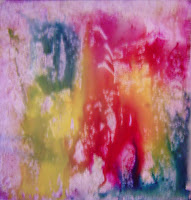
This first one is simply that, areas of colour with quite a few fine sprays of water left leaning to run ... and I captured the moment when the paint was still moving.
No 2 is taken a stage further so that before it stopped running I used a soft sponge roller very gently.
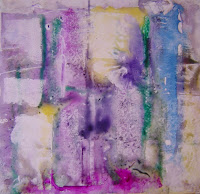
No 3 is more gentle in colours (ie not so much pigment), sprayed finely in some areas, rolled with sponge in others and used pieces of card to remove colour in square shapes almost back to the YUPO white but just a little staining left to show.
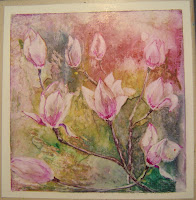
So here is a finished background and floral piece put together. After creating the background, I simply removed the paint with a damp brush in the shapes of the petals and stalks - no drawing at all. Then in places allowed some of the background to merge into the petals by softly spraying selected areas, and in others adding stronger tones of the magnolia pink.
All great fun.
By the way, do you like my replacement photo with my new glasses on My Profile photo???
Labels:
backgrounds,
flowers,
YUPO
Saturday, 24 January 2009
WATERCOLOUR PENCIL ZENTANGLES
Just to give you all a break from my YUPO studies, here's a couple of zentangles I've created in the past week but this time I used watercolour pencil and then in some areas used my waterbrush to smooth the colour to give contrast to the pencil work. Dont know if they can still be called zentangles as they are getting more like 'scenes' .... I think they are worth enlarging to see the detail.
I think I was influenced by some of the zentangles posted by others where I liked the addition of floaty bits outside the main shape.
Labels:
watercolour pencils,
zentangle
Thursday, 22 January 2009
FIRST YUPO FLOWER
Yesterday I played with YUPO again and after an effort with a rather merky pond scene I decided to see what I could make of this technique with my old favourite - FLOWERS.
I started by laying on creamy colours from my White Knights pan paints starting with their vermillian hue, Titian, green light, cadmium yellow covering the whole square I had taped down on my work board. Then I rolled my little sponge over it from top to bottom before it was dry and where necessary spraying with a small water bottle, blending the colours next to each other to create a soft mottled background for the flower shapes.
I waited a little while to ensure the line was sharp before using the vermilion a little thicker to paint the bud and petal shapes freehand, leaving areas of the original background showing through. I then cleaned off some off that within those shapes to create the lights. Added stalks and leaves in the same way blending with a number of greens and yellows, also lifting off here and there. Finally added the dark reds and stamens and touches of olive green.
Must confess after leaving it all to dry, I did titivate a little in the background by spraying with water and softening with a tissue. There are signs of the pattern on the edge of the tissue printed onto the background (see bottom right corner). Plan to develop this idea more in another flower painting.
I have always wanted to achieve some of my floral paintings to look more wet on wet, and I think with YUPO I have found a way. I am certainly going to develop it.
When I removed the tape there was a clean white border which I feel enhances the colours.
Tuesday, 20 January 2009
A NORFOLK VILLAGE WALK ON PRESIDENT'S INAUGURATION DAY
Firstly, may I wish all American blog visitors a very happy day for your new President's inauguration ceremony and wish your nation peace and harmony under his direction.
As the morning dawned with a bright winter's day with blue sky, I decided to take up an offer I had from one of my workshop members to visit her in the next village to see her Chinese paintings today.
This is the name of the next village, but when you arrive in Norfolk you have to learn a new English language as I found out this was known locally as HOBIS!!
Walking on I came to the little church of Trinity, with a chimney sticking out the back. Can only assume they had a kitchen added at some time with fireplace.
Then I came across two interesting aspects of England I had to photo:
as I passed the centre for Girl Guides holidays and activities and then spied this very unusual timber used for a telegraph pole - I do like seeing such patterns created by nature.
Then before I got into the middle of the village there was a road warning sign before we turned the bend and came across the village ponds
Finally here are images of Audrey's lovely Chinese work hanging in her converted barn. She had studied with Diana Kan whilst living in New York.
During the coming year we shall be working together on floral watercolours but with this ability as her starting point she will easily master the techniques very quickly I am sure.
Labels:
Chinese painting,
churches,
Norfolk
Monday, 19 January 2009
FIRST PRACTICE WITH YUPO
Now I want no laughter at my first efforts with YUPO and watercolour paints. As I have a major project of the local river scenes to work towards for Easter, I thought I would practice with photos of the river, common, trees and boats. I tried a number of techniques and will try to describe them to you for each image below.
FULL PICTURE EARLY EFFORT - This is my first attempt of a piece of YUPO stuck on my drawing board to stop movement. In my impatience I started before I had purchased any rollers and it is basic, simply laying thinnish colour and lifting with soft tissue for sky and water, I used a brush to lift out for the boats, their reflections and boathouse shapes and layered three different tones of brown for the roofs. As you will see on the next, I have improved a technique for trees:
TREES - This shows the effect of laying down areas of reds, greens and yellow with thick paint, then while damp dabbing with a wrinkled up soft tissue, finally when it is nearly dry lifting out the colour to show whitish tree trunks against the darks.
WATER - this is my attempt at laying green and blue thick paint for the water and then spraying and leaving to move on a slight incline. Then I lifted the bluey green paint out to give whitish reflections. Finally lifting out over and over again the shape of the boat to get it cleaner and back to the YUPO white.
FULL PICTURE EARLY EFFORT - This is my first attempt of a piece of YUPO stuck on my drawing board to stop movement. In my impatience I started before I had purchased any rollers and it is basic, simply laying thinnish colour and lifting with soft tissue for sky and water, I used a brush to lift out for the boats, their reflections and boathouse shapes and layered three different tones of brown for the roofs. As you will see on the next, I have improved a technique for trees:
TREES - This shows the effect of laying down areas of reds, greens and yellow with thick paint, then while damp dabbing with a wrinkled up soft tissue, finally when it is nearly dry lifting out the colour to show whitish tree trunks against the darks.
GRASS - This is how I achieved a large expanse of grass. Laid down a wash of yellow and green watercolour quite thick, allowed to slightly dry and then ran a small 1 inch sponge roller over it all. It brings up these lovely speckled effects. Only trouble is you have to wash the roller sponge thoroughly, or that colour will contaminate anything else you roller later.
WATER - this is my attempt at laying green and blue thick paint for the water and then spraying and leaving to move on a slight incline. Then I lifted the bluey green paint out to give whitish reflections. Finally lifting out over and over again the shape of the boat to get it cleaner and back to the YUPO white.
As you will see, nothing is ever 'finished' they are just exercises. I think next time I'll just do an 'abstract' play with different thicknesses of paint, using rollers, tissue, cards to make lines and anything else I can lay my hands on!! Only trouble is you have to use quite thick paint and its expensive with my Sennelier, Winsor and Newton or Sminke watercolour tubes. I have cheaper White Knights but they are in pans and will take ages to get a pool of creamy thick colour together.
Saturday, 17 January 2009
CHAPEL LANE WINTER PLANTS
A little bit of nature's brightness to cheer us up in winter:
Despite a winter so far here in East anglia including little bit of snow, sleet, rain, fog and freezing temperatures, on a stroll one sunny day last week I spied all these brave plants growing in the hedgerow opposite our houses in the lane. Some may have been planted a while back by neighbours or our predecessors, as I dont think they are all wild. Must be very sheltered here for them to continue to show their lovely faces here in the middle of January. I leave you to name them.
Just to prove the fog element of our winter weather of late here's a photo from my study window looking past the apple tree (with pigeons or doves) to the church tower in the mist one morning.
I've been playing with my YUPO 'paper' and finding it much more difficult than putting watercolour onto gesso. Oh well, I think I must forget trying to achieve a 'picture' and just play with colour and techniques. I've bought some rollers (smooth sponge) to blend the colours side by side or smooth an area so maybe I'll end up with an abstract effect. I'll keep you posted!
Friday, 16 January 2009
VOODOO SPECS
Well, I have collected my new specs. They are pearly pink inside and on edges and deep plum on the outside with the lovely daisy motif and the word of the manufacturers VOODOO down the arm - really suit zany spiritualist me!! They are so smooth and comfy on I am delighted.
So I thought it was about time I used an up to date photo in My Profile wearing my new specs. This is one I shall use taken in doors and guessing as I held the camera up and away from me. Now you can see all the lines, the uneven teeth and triple chins - so I'll now confess to my blogger pals not bad for 73 next month!!!
Tuesday, 13 January 2009
TODAY ONE WHOLE YEAR A BLOGGER
This is post 125 and 3535 visitors on my counter. Cant believe where the time has gone and what I would have done with my time when sitting here in my lovely comfy study bashing away on the keyboard to communicate with the best bunch of art pals worldwide. I have so appreciated your support, advice and friendship you have all brought to me.
ARTICHOKES WATERCOLOUR PENCIL PRACTICE
Today I'm going to post a series of watercolour pencil stages of a group of artichokes, as I agreed at the last workshop that watercolour pencils was going to be the new media for our February workshop. .. so I thought I ought to remind myself of their versatility. I spied some dried artichokes growing in one of the allotments and had permission to cut them down for sketching.
I hope my sketches show a) how to pencil sketch lightly a simple composition giving various angles of the flowerhead, b) how to add dry watercolour pencil marks, c) add water with a brush to some areas leaving others dry and finally d) how to use strong linear marks created by wetting the tip of the pencil.
Labels:
art workshops,
flowers,
watercolour pencils
Monday, 12 January 2009
GENTLE FLORAL CIRCULAR ZENTANGLE
Very gentle and quiet for bold me - now I'll tell you why:
Friday I felt a bit off colour and put it down to having the flu jab the previous day. Saturday wasnt much better and then after a delicious bolognaise cooked by my culinary expert husband and sharing of a bottle of Claret , I was violently sick three times and passed out!!! Then once Clive had got me to bed it started all over again at 1.30 in the morning. Yuch!!
So Sunday afternoon I decided on a quiet time in comfort in our sitting room with Clive (who was watching Man United and Chelsea) and got together my watercolour pencil box, a new larger sketchbook with better quality paper and my pens. I was 'away' not with the fairies but the flowers and created the above. Based the shape on the previous one of a circle within a circle plus the quarter shield/petal shapes to see how different it becomes under different circumstances. I added the butterfly last of all in the middle which I had left blank until the end - because there is one stuck on one of the windows I could view from my armchair. By the time I added pear and apple I think I was feeling a wee bit hungry but did the sensible thing and only had a cup of good old English tea.!!
Saturday, 10 January 2009
COME ON OVER AND JOIN ME ....
This was an invite in wonderful Margaret Anne Storer Roche's recent post where she created a fun colour patterned design after her snowflakes and organic lacy patterns. Go over to see her wonderful work on http://waterblossoms.blogspot.com .
So I thought I'd use my zentangle session last night and add colour to my meditative lines.
When I started adding colour with watercolour pencils it was with more intent than the original lines and it was fun waiting to see what effect each colour had on the design. Unfortunately, it began to stretch over the page and ended up scew whiff - so I cropped it and turned it to have a 'base' feeling - as a result we have a strange overall shape with ancient manuscripts, piano keys, spears and shields.
Must tackle another one but more organic intent from the start - as I love leaf and floral patterns. Thinking a little of such designs as William Morris and the paisley designs of yor.
Thursday, 8 January 2009
COMPLETED OIL OF THE RISING SUN PUB
Well, here it is completed. I've added the people at the picnic tables, the bridge and posts , softened some of the colours in the roofs, adjusted some of the greenery behind one or two of the chimney pots and made myself clean up the palette and brushes and put the paints all away so that I wont fiddle anymore!!! Oh yes and added the name of the pub on the wall after a discussion with Anita about how she would tackle lettering this small.
Hope it doesnt disappoint all those who kindly commented on my earlier stage post. Afraid the blue has come over rather strong in this photo.
Labels:
architecture,
boats,
landscape,
Norfolk,
river,
The Rising Sun pub
Monday, 5 January 2009
LOCAL RIVER SCENE
Do you remember I started an oil painting of the local riverside pub from a photo I took last May, and now with Christmas and New Year celebrations over, I have returned to it. This is the stage so far. Pleased with the finish of the trees and sky. I still have to add the little wooden bridge on the right, the garden tables and people eating and wandering around, add white for the pub window frames and improve the building on the left with the dark panelling and its reflection.
Hoped to get a few hours with it today but just returned from a visit to the opticians and I have gone very snazy ordering a pair of VOODOO glasses made from a very smooth quite thick surface with a floral motif on the sides to get away from my slim metallic ones which are beginning to make the bridge of my nose sore and feel quite sharp. Cant wait for them to be ready - or for Anita to see them on me !! mad woman that I am - what a choice at my age!!??
Im really enjoying working in oils as a change from all those recent penwork zentangles.
Labels:
architecture,
boats,
landscape,
oil painting,
river,
The Rising Sun pub
Sunday, 4 January 2009
ZENTANGLE EGG
Can't seem to leave these creations alone - my pens and special zentangle sketchbook are by my bedside. Its almost the way to get one into a slumber mood to have a good nights sleep. This one was achieved last night - but not at 2 am this time!!
Started with the catherine wheel white shape at the bottom and moved on from there - I spy a rope, a squashed tube of paint, a gourd, a bird's wing, a chequerboard and ribbons holding the egg together. None really intentional - even the final shape of the egg came at the very end. Lost a little bit of the curve on bottom left as it was right up to the edge of the page.
Bet all those psychologists out there could read a lot into these various images. Ive decided not to think too deeply just enjoy the process.
Thursday, 1 January 2009
IM HOOKED - ZENTANGLE PROJECT 2009
As in the last post, the main image wont enlarge, so I have added a couple of closeup extracts for you.
I came to my study this afternoon to get on with the oil painting I had started way before Christmas of the local pub by the river and the surrounding area .. but you've guessed it I
opened my new spiral sketchbook I have set aside to do regular zentangles as a New Year project and finished this circular version.
I had simply drawn out lots of different sized circles overlapping each other within one large circle and I just got on with filling in the rest of the circles I had'nt finished yesterday - voila here it is. Very organic again - but thats whats inside me creatively I suppose.
Its 5 inches diameter and drawn with Hi-Techpoint V5 black and Faber Castell 0.5 black pens.
The straight dotted line on the left is part of the spiral binding of the sketchbook which I could not avoid when I scanned it. Its great fun - why dont you have a go.
Subscribe to:
Posts (Atom)